A LITTLE HELP

How can we help?

Find help with getting started, sync, backups and more.

Choose a topic to jump right in.

Is PlanMini free?

Yes. PlanMini is free to use on the web and Windows, with no subscription or payment required.

Getting started

Connect your Google account and make room for your first plan or note.

  1. Open PlanMini and choose to start with Google.
  2. Review the permissions for calendar and workspace sync.
  3. Choose an existing Calendar and Drive workspace, or create one.
  4. Add an event, task or note, then check that sync has completed.

Connecting your Google account

Choose your Google account on the sign-in screen. Calendar access lets PlanMini read and update events; Drive access syncs notes, tasks and attachments. Your Google password is never stored.

  1. Use the same account and workspace on your other devices.
  2. You can disconnect Google from Settings whenever you need to.

Adding plans to your calendar

Choose a date or select New event, then add a title and time. Use all-day events for plans without a time and recurring events for regular appointments.
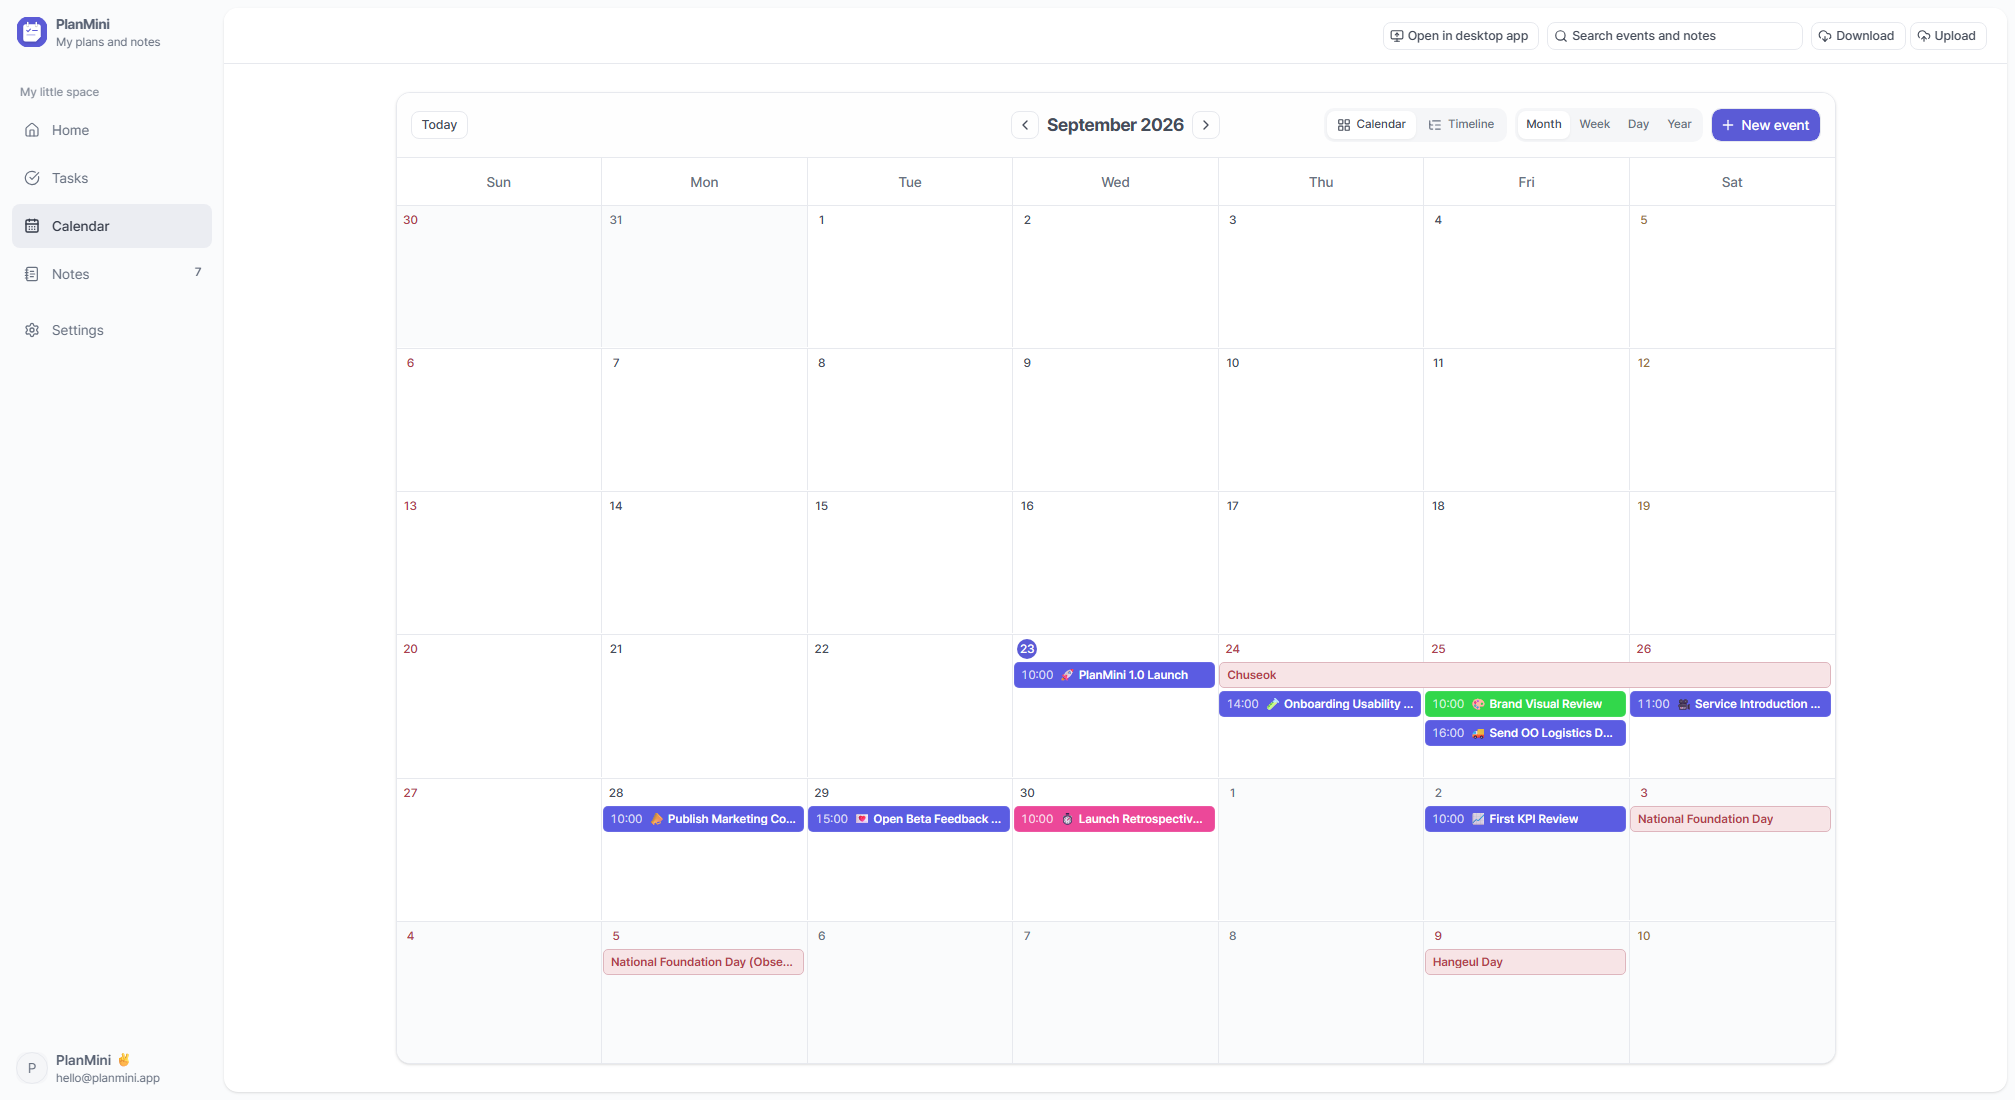
  1. Switch between month, week, day and year views.
  2. Choose event colors and drag regular events to another date.
  3. Repeat daily, weekly, monthly, on the last day of the month, or yearly, with an optional end date.
Monthly calendar with color-coded events

Small tasks and everyday routines

Create a task list and add your checklist items. Tick off completed items to see your progress.
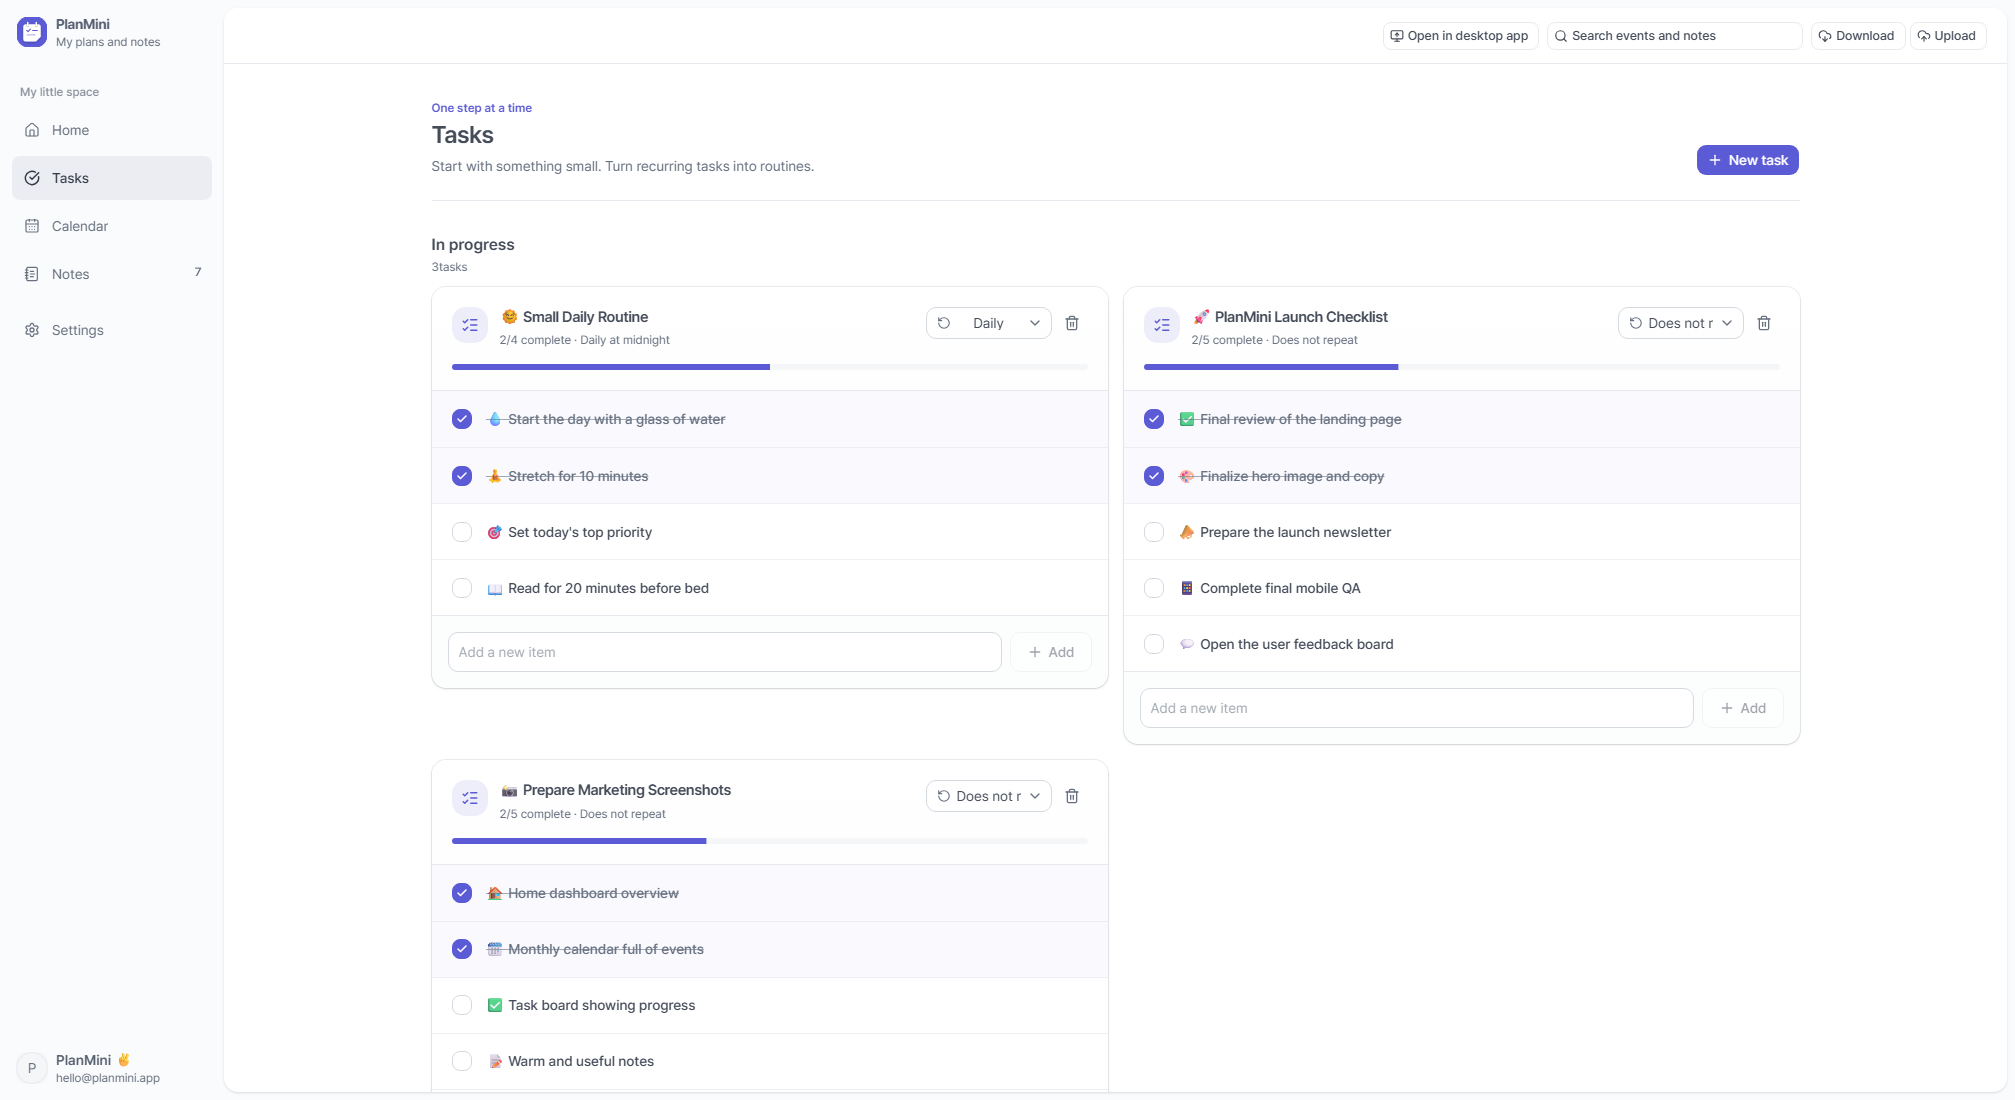
  1. Keep separate lists for errands, preparation and work.
  2. Set a repeat schedule for daily or weekly routines.
Task lists with progress and daily routines

Writing and finding your notes

Use the + button in Notes to create a note. Add a title and text, then tables or images when you need them.
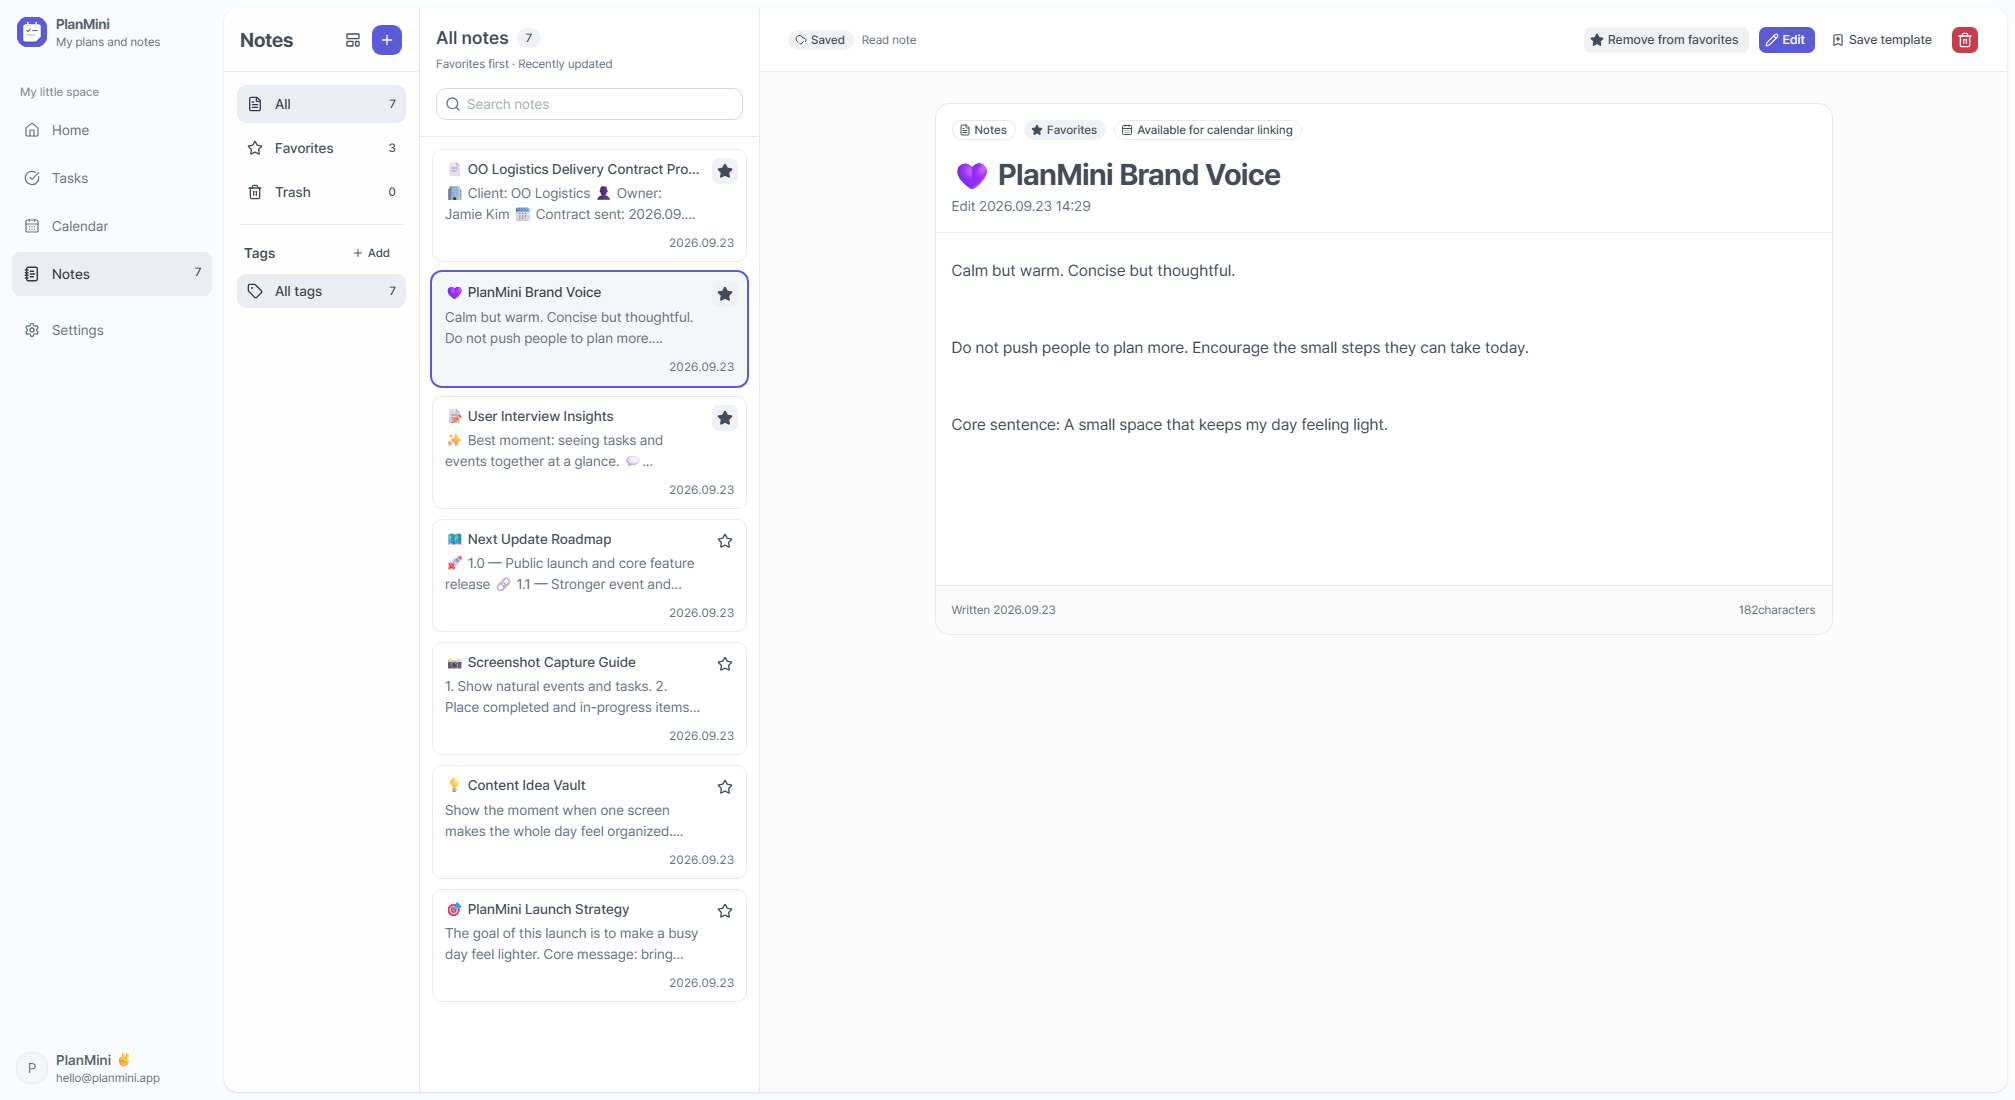
  1. Favorite important notes and organize related notes with tags.
  2. Use text formatting, lists, tables and images. PNG, JPG, WebP and GIF images are supported, up to 5 MB each.
  3. When you finish editing, save and wait for the Saved status.
  4. Deleted notes can be restored from Trash. Permanently deleted notes cannot be restored in the app.
Notes with favorites, tags and rich text

Reusing note templates

Save recurring structures such as meeting notes and reports with Save as template. Next time, load the template and fill in the details.
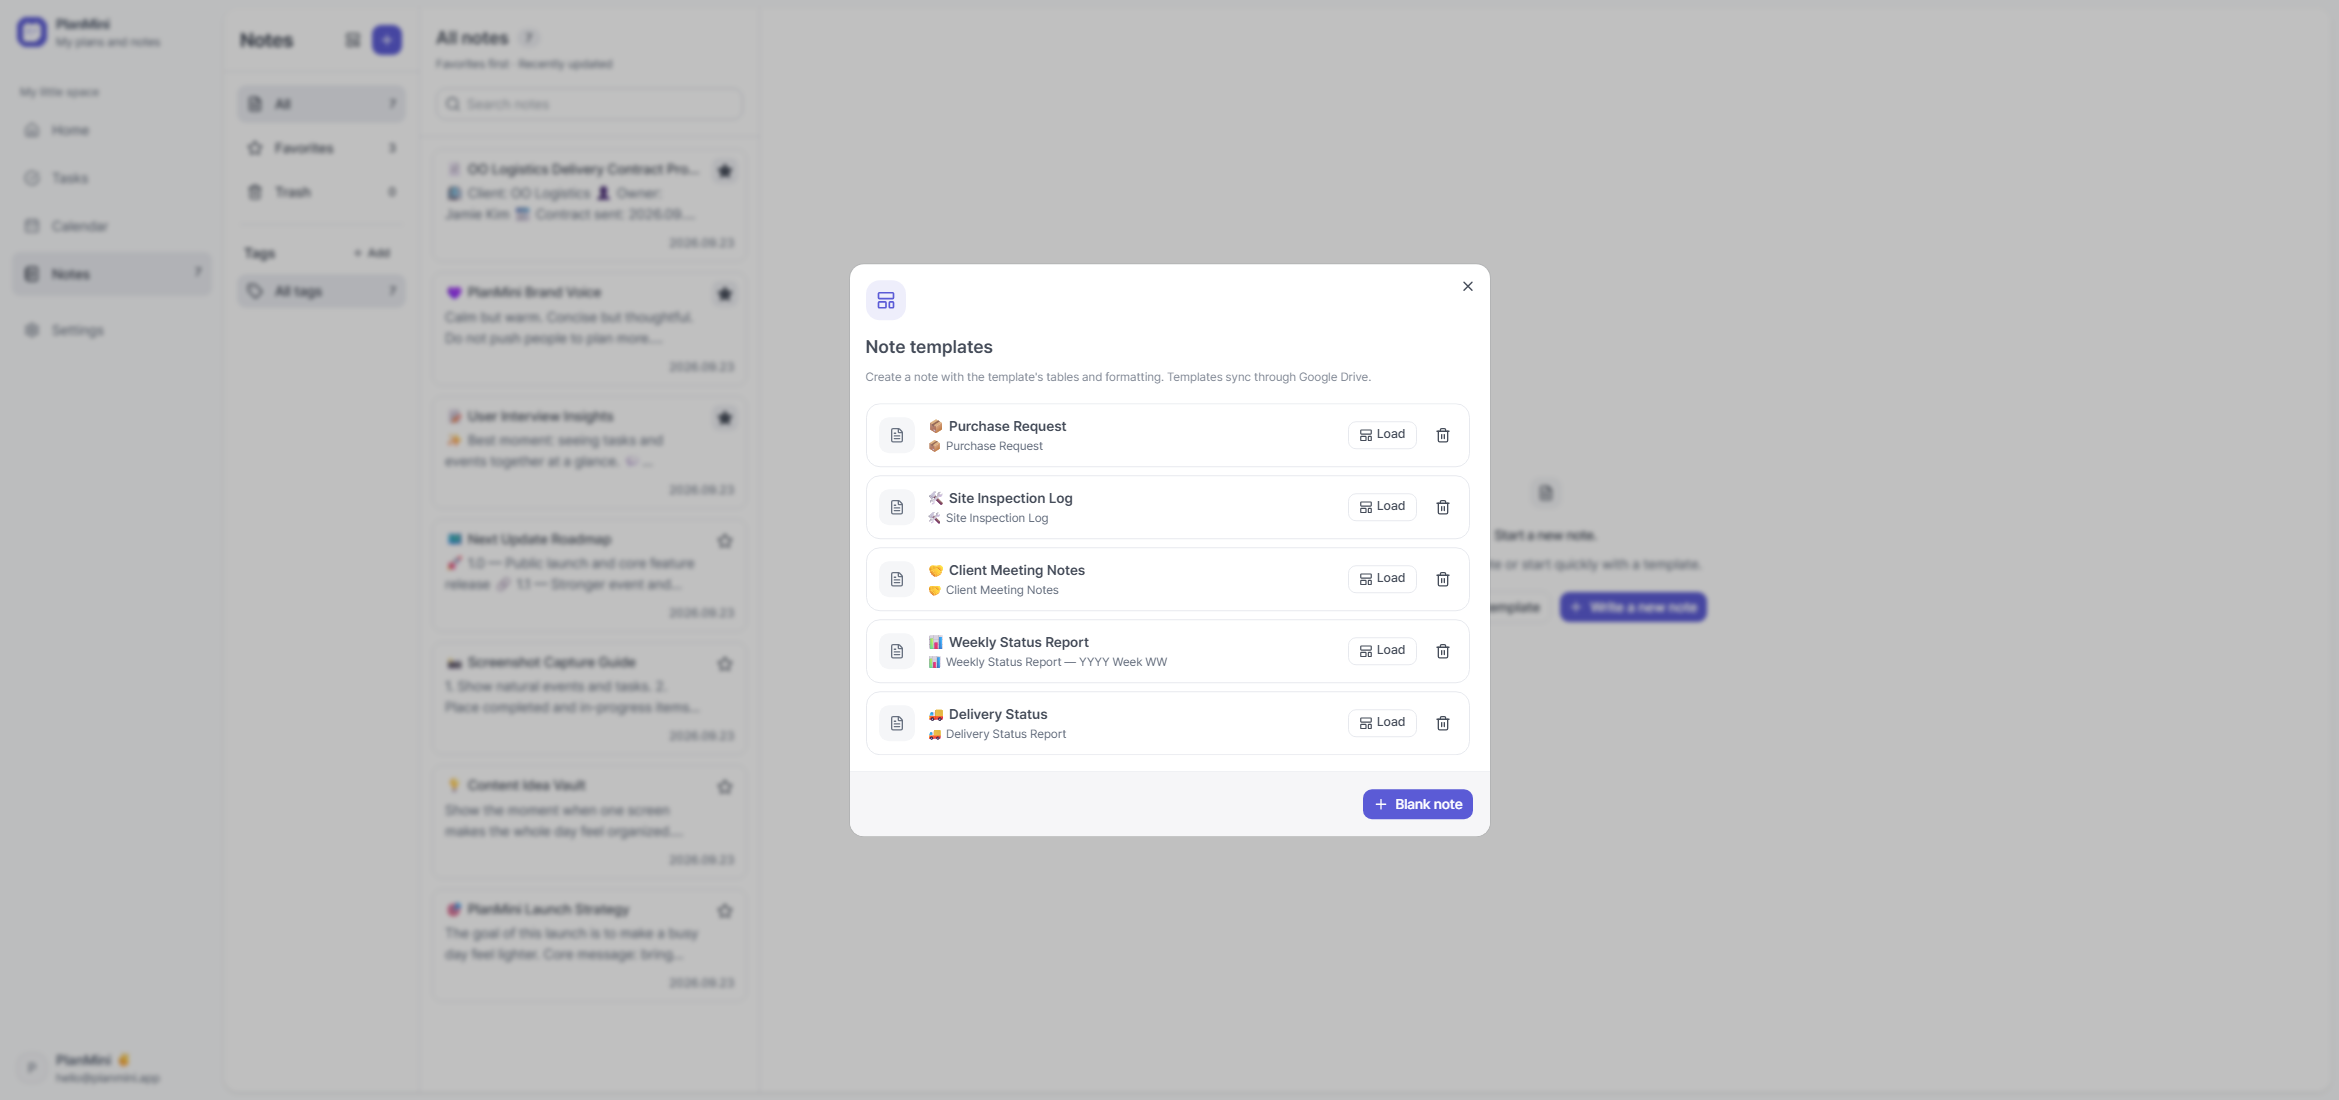
  1. Choose Save as template from an existing note.
  2. Pick a template when creating a note, or load one while editing.
  3. Text, tables and formatting are reusable. Attached images are not included.
  4. Templates sync through Google Drive too.
Reusable meeting, report and inspection templates

Connecting a note to an event

Attach meeting notes to a meeting, or preparation notes to a delivery. Open the details directly from the event.
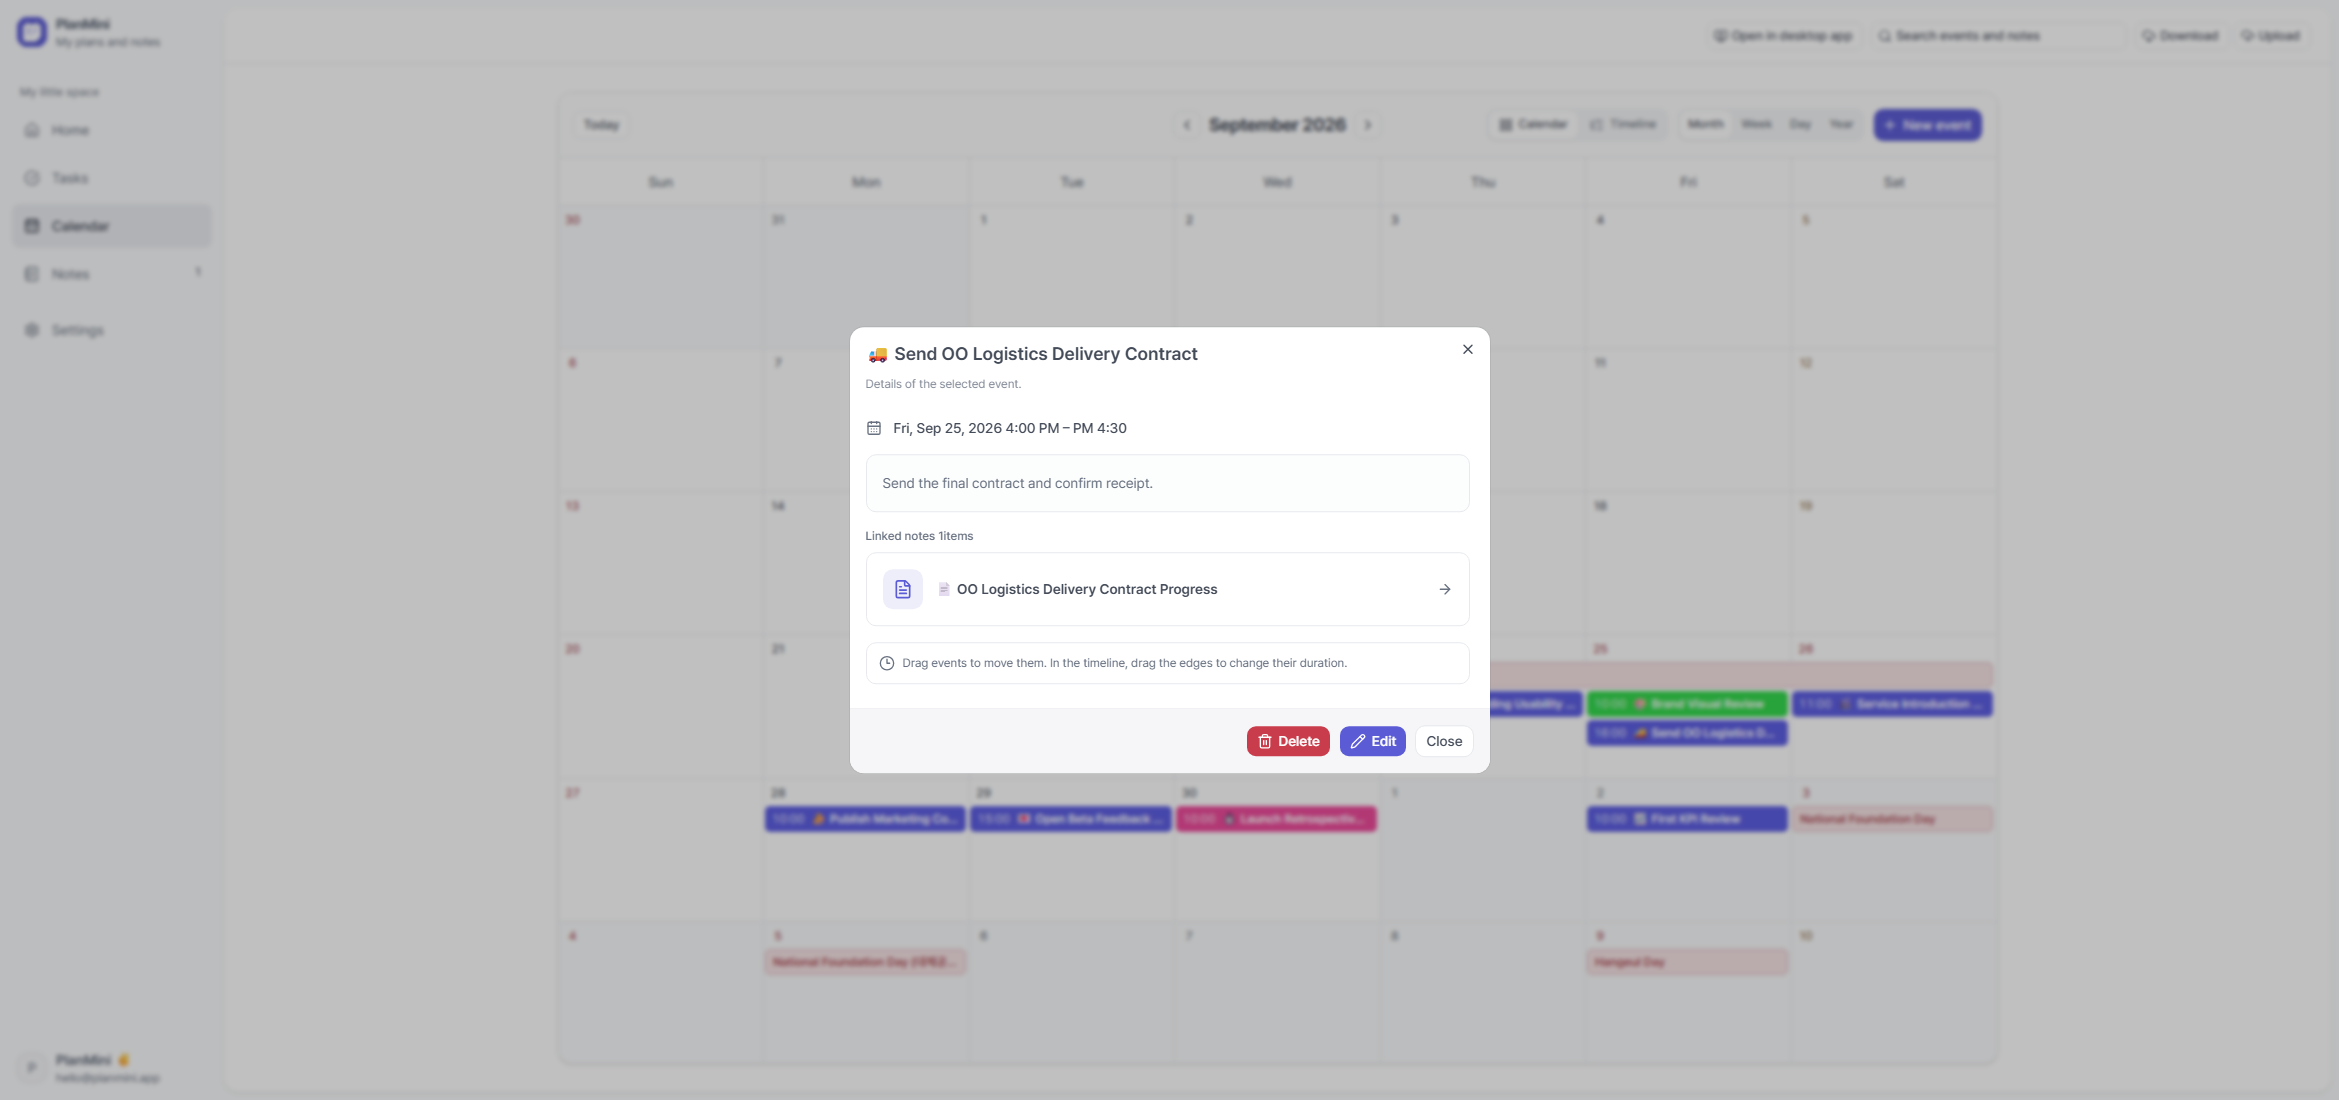
  1. Edit the note, enable calendar linking, and save it.
  2. Create or edit an event and open Linked notes.
  3. Find your note using search or favorites, select it, and save the event.
  4. You can link multiple notes to an event. If a linked note is in Trash, follow the restore prompt.
An event with a shortcut to its linked note

Checking your sync status

Look for Sync complete at the top of the app. Events sync with Google Calendar; notes, tasks and attachments sync with Google Drive.

  1. The web app cannot sync automatically while the browser is closed or Google access has expired.
  2. Reconnect Google to resume syncing pending changes.
  3. If a note was edited on multiple devices and a conflict appears, compare both versions and choose the one to keep.

Backing up and restoring your workspace

Open Backup & PC transfer in Settings to create or restore a backup. It includes calendar information, notes, attachments, tasks and app settings.

  1. Keep the backup file in a safe place you can find again.
  2. Connect a group using the Google account that created the backup, finish syncing, then review recovery. Choose the current or backup version for changed items.
  3. Apply recovery to save all choices together. Existing items are preserved and backup deletions are ignored. Check your records and sync status afterward.

Moving to another PC

Install PlanMini on your new PC and connect the same Google account and group to continue through sync. Review and restore a backup into an existing or new group on the same account.

  1. Check that events, tasks, notes and attachments appear on the new PC.
  2. Keep the old PC’s data and your backup until you have checked the transfer.

Choosing a comfortable theme

In Settings → Theme, choose light, dark or system mode, then an app theme. System mode follows your device’s display preference.
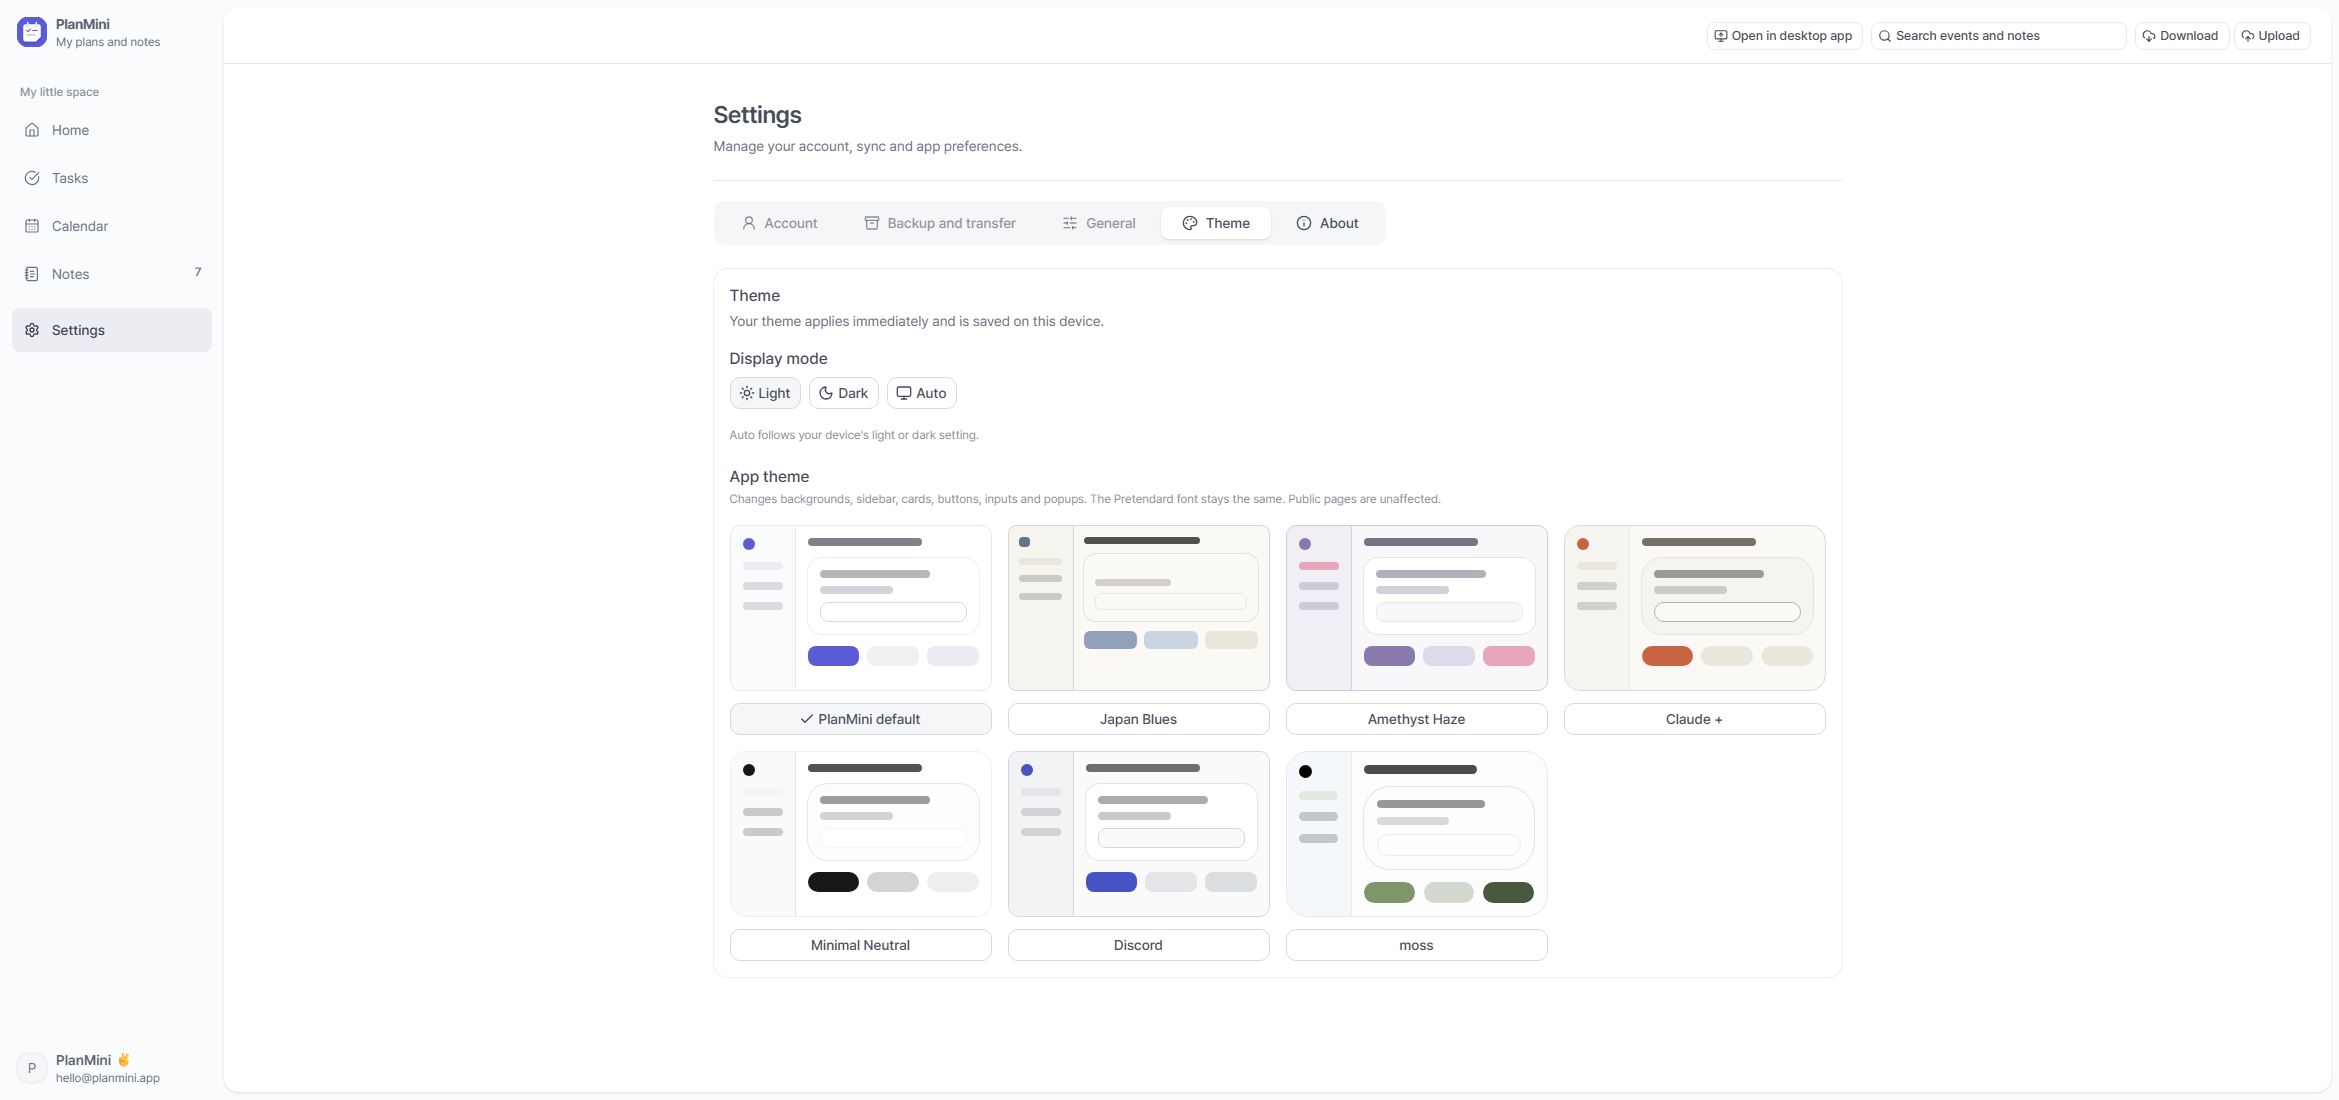
Seven app themes and display mode settings

Desktop settings

Set PlanMini to launch with Windows or start minimized. You can also use a desktop shortcut and a four-digit PIN lock.

  1. Change startup and minimize options in the desktop app’s settings.
  2. With PIN lock enabled, enter your PIN when starting a new app session. Hiding the window to the tray keeps the current session and widgets available.

Frequently asked questions

Can I use it without installing? Yes, PlanMini works in your browser too. Syncing between devices requires a Google account.

  1. Offline changes stay on this device. Reconnect and wait for sync to finish before continuing on another device.
  2. Google user data is not stored on a separate PlanMini operator server.
  3. If a note is missing from the event picker, check that calendar linking is enabled on that note.

Feedback and suggestions

Share an idea, feature request, or bug you found while using PlanMini.

Used only to reply or let you know when your suggestion is released.

Only this nickname can be made public; your email is never shown.

If your suggestion is released, we may credit it as ‘Special thanks to nickname.’

For bugs, include the steps and platform you were using. (Up to 4,000 characters)